Sunday, July 10, 2011

Kitchen Cabinet Progress

I mentioned that I would be using the Rust-Oleum cabinet transformation kit to redo our cabinets. I am about 1/2 way through the kitchen cabinet transformation, so I thought I'd show you how it's going - So far I am really pleased with the product. I had a couple minor set backs but those were operator error. I somehow dripped the top coat on the front of the cabinets while finishing the back, it hardened and became a pain to remove and had to do a major touch up on about 5 cabinets. I think it would have been easier to just have redone the whole front but I was trying to conserve the products. Anyway, I have 1/2 of the kitchen done! Between coats, Todd and I just stand facing the completed side, repeatedly saying "I can't believe how good it looks! They look like brand new cabinets!" We are very pleased to say the least.

Pictures of our progress:
(After playing around with the settings on my camera - using the "food" setting,  I finally got a few that were closer to the true color which is a nice chocolate brown. Maybe the "food" setting worked because the color we chose was cocoa? or because it takes place in a kitchen?? Who knows.)

Before pictures:

(look behind the popcorn ceiling-dust-covered me and at the cabinets!)


For some reason the countertop goes all the way against the oven, while the cabinets do not. There is about a 3 inch gap on both sides between the cabinets and oven. Which the previous owners covered with a strip of lament. See how we fixed it below...
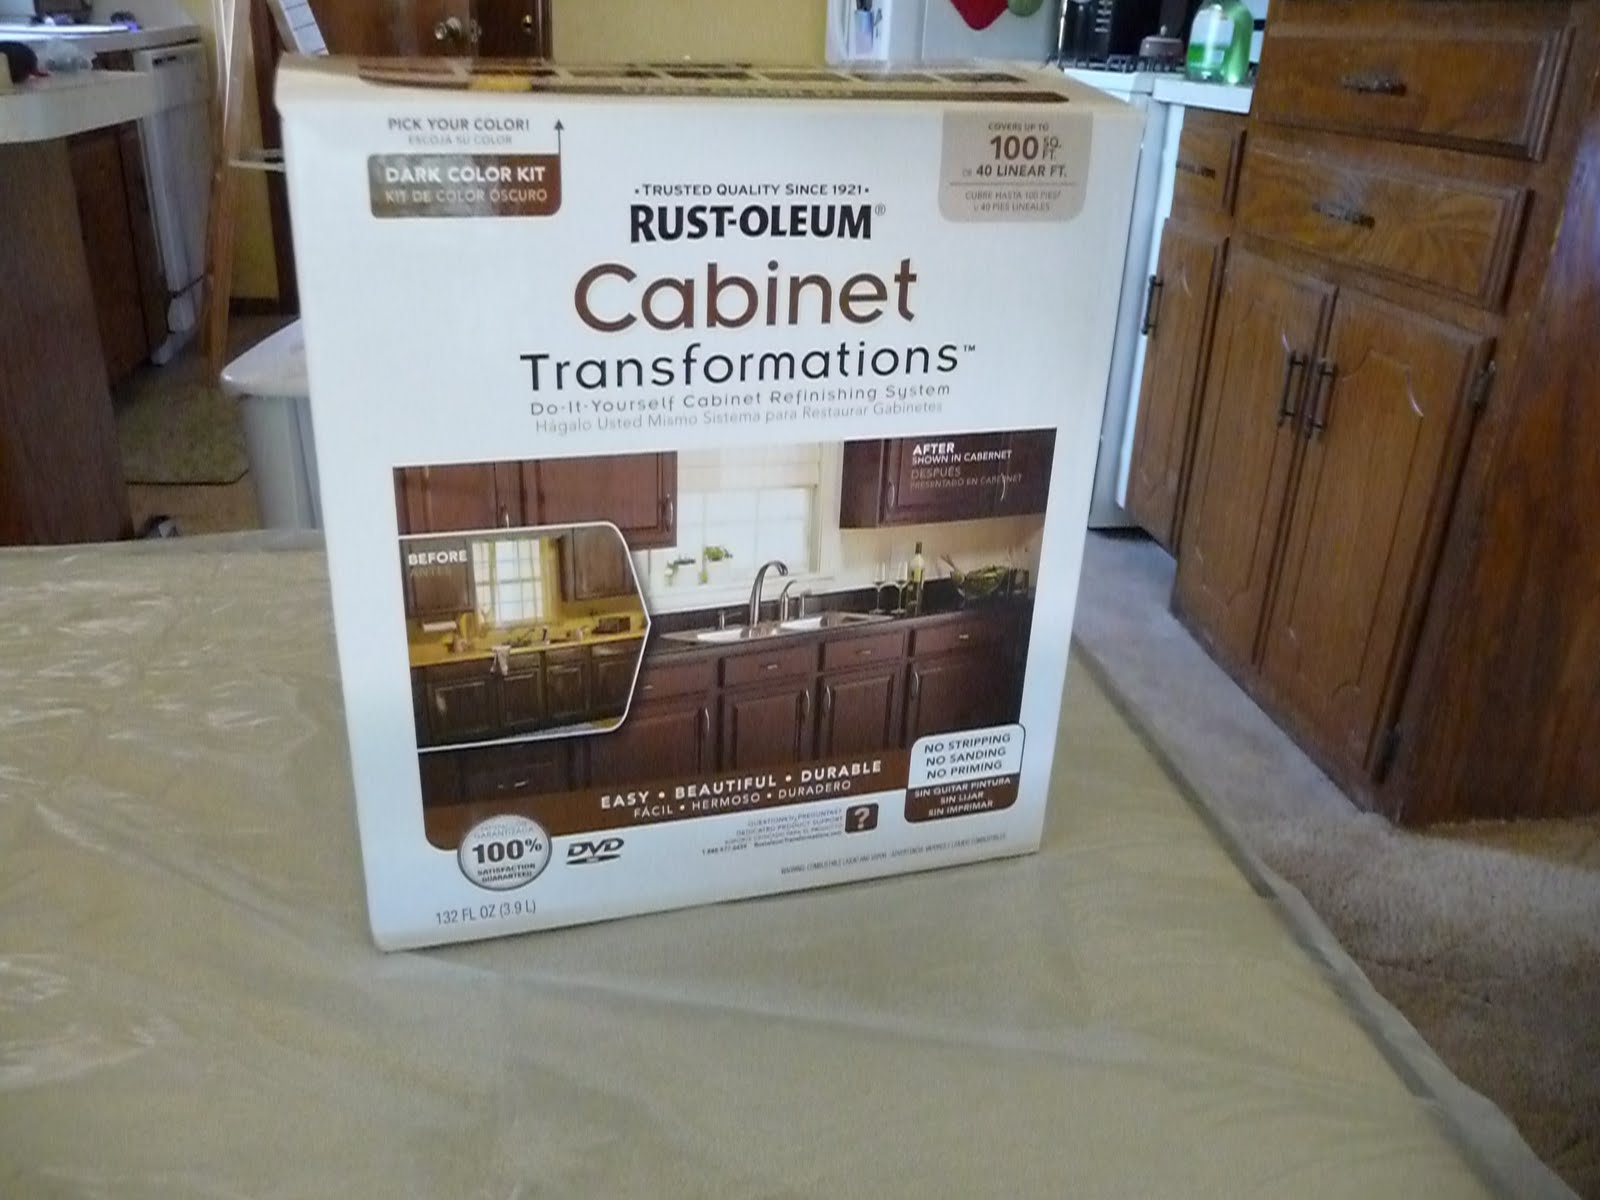


During:
This is after the doors and cabinets had been cleaned and the "bond coat" (sort of like paint/primer) had been applied


More during:

After you apply the Bond Coat, then you apply a decorative glaze provided in the kit. This is what really brings your cabinets to life and gives them character and a professional quality I don't think would have been achieved by paint alone.


The final step is to apply a clear top coat, which is also provided in the kit.

After (so far):


We added a piece of trim in place of the laminate to cover the gap next to the stove.


Sadly, my camera isn't able to properly capture the effect the "decorative glaze" has. It really makes a difference in person. I'll continue to play with the settings on my camera to see if I can get a better picture. 

 I am also in love the the hardware we chose, I'll show you a close up next time.
There is still a lot to do - Finish the rest of the cabinets, apply the hardware (we just bought a few to test them out) and do touch ups! I can't wait to finish so I can have my kitchen back and show you the final look!

one more before and after: 


Linking to:
 UndertheTableandDreaming

beforeAndAfterButton


Enhanced by Zemanta

Saturday, July 2, 2011

Kitchen ceiling and lights complete!

We've finished the ceiling and lights in the kitchen! It was a lot of work but I think it makes a huge difference!

Before and afters:

Before:


After:


I also updated the light fixture above the sink to match the new fixture we installed.
All it took was a few shots of Rust-Oleum's Oil Rubbed Bronze. I used the paint and primer version, and it covered beautifully.

Before:

After:
(I haven't put the curtain back - and you can see a little preview of the cabinet transformations I've started working on!)


Here they are together:

Linking to...


Thursday, June 30, 2011

Cabinet Transformation

I started working on the next part of the kitchen make over! Here's a hint:


The color we chose is Cocoa.


I think it will bring a richness to the kitchen while sticking with the wood tones of the rest of the house.

The ceiling and lights are pretty much done. I just have to attach one more fixture and touch  up a couple smudges from installing the recessed lights. I'll work on those between steps in the cabinet transformation! I hope to post the finished ceiling and lights by tomorrow.

Monday, June 27, 2011

Kitchen Make Over! [drywall repair and texture]

When we left off, we had taken down the old fluorescent box light and removed the popcorn ceiling. You can read about that here.

Once all of the popcorn texture was removed, it was time to finish the ceiling.This involved patching old holes, cutting new holes and applying a new texture to the ceiling. Our plan was to remove the four fluorescent tube lights, and install recessed lights instead. However, none of the recessed lights would be using any of the holes from the original light fixture :( So we had four holes to patch and five new holes to cut (in addition to the four recessed lights we ordered an awesome light fixture/fan combo for the center of the room). Since I had so many holes to patch I decided to apply a subtle texture to the ceiling to help mask the patches.


Todd removed the old light fixtures and I set to work patching the holes they left behind. I used a self-adhesive drywall patch I found at Lowes. These work great! It's as easy as it says on the package - stick it on, cover with compound, sand and paint.

The product:

Patch in place!

It was only after we removed the light fixtures that I realized there were a number of smaller holes as well. For these I just used a small square of drywall tape.


Once patched, I neatly applied drywall compound to cover the mesh. Once dry, it was time to lightly sand it, prime the walls and ceiling and then apply texture.

To create a texture similar to that found in other parts of our house, I found this product made by Homax. Texture in a can! I have to say that overall I was very happy with this product. Very easy to apply and I was happy with the way it looked. The one drawback (and it's a pretty big one) is that it didn't cover anywhere close to the amount of space it says on the can. It says it should cover at least 25 square feet and for me it was covering maybe 15 square feet. Quite a big difference, but I didn't want to switch techniques in the middle of my project, so I just bit the bullet and bought more cans. I would definitely use this product again, but probably not for such a big area. What the product lost in coverage area, it made up for in ease of use and a pretty finish!

Picture of the can:

Spray it on in a circular motion:

Let it set up for a few minutes (the can says 2, but in our heat I found that 5 worked better for me). Then, holding a paint scraper/mud knife parrallel to the wall, lightly swipe the knife over the area.


Tada!


Once it's fully dry, it's ready to paint!

 UndertheTableandDreaming
Tip Junkie handmade projects

Saturday, June 25, 2011

Kitchen Make Over! [part 1]

Todd and I decided to spend the summer giving our kitchen a make over. The first part involved tearing down the fluorescent light box that took up the majority of the ceiling.

The official before pic:

After removing the plastic covers/diffusers  


After we removed the wooden structure

Assessing the damage

The next step was to remove the popcorn from the bottom part of the soffit. I read a lot of tips on removing popcorn ceiling. I found that ours was more difficult than most of the ones I saw on "how to" videos because ours had been painted [with seemingly impenetrable paint!]. 

What worked for me:


  • A garden sprayer and household spray bottle - I used both depending on the space I was working in. It was hard to get the garden sprayer in some areas. I filled both of these with WARM water and a little dish soap. I found that the warm water really made a difference. I also liked that this garden sprayer had a continuous spray option. 
  • Metal paint scraper
  • Utility Knift
  • Razor blade scraper
I had read that if you moistened the popcorn with a sprayer it would just scrape right off. This didn't work for me because the mist couldn't penetrate the layers of paint on the ceiling. So I ended up using a utility knife to score the ceiling (being careful not to go too deep). After I scored the popcorn texture, I then moistened it using the sprayer. After letting the warm water/soap mixture soak in, the majority of the texture scraped off easily. It did create quite the mess though! There were a few parts that were especially hard to scrape completely off. I found that if removed all of the loose parts and then sprayed again, it was easily removed with the razor blade scraper.

Thanks Todd for taking this bad picture of me picture of me looking hot in my safety gear. Not flattering. But what you do see is safety glasses and a mask. I left these out of my picture above but they are definitely a must. Dampening the texture keeps the dust at a  minimum but there is still A LOT of dust and you don't want to breathe it in!


Popcorn ceiling removed!

Stay tuned for the rest of the ceiling transformation and new lighting


 UndertheTableandDreaming 
Enhanced by Zemanta